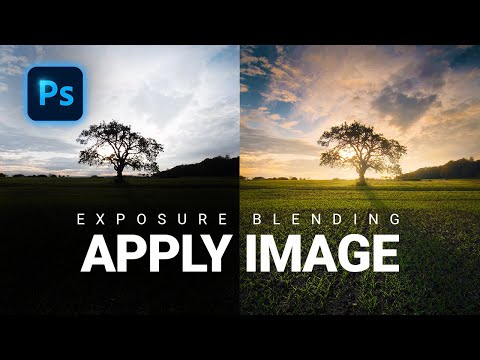
In this #Photoshop Tutorial I‘m showing you a rather hidden Tool to easily do exposure blending with multiple images.
If you want to follow along this tutorial, you can find the three raw files here as a download. Feel free to share your version of the edit on IG, but please tag me @thephlog
https://drive.google.com/drive/folders/1gjLk3GydhYbx82JUIO1EwuQhHKaLDk32?usp=sharing
▬▬▬▬▬▬▬▬▬▬▬▬▬▬▬▬▬
Thank you for watching my video!
► Prints: http://www.the-phlog.com
► Patreon: https://www.patreon.com/phlog
► Instagram: http://www.instagram.com/thephlog
► Facebook: http://www.facebook.com/phlog
▬▬▬▬▬▬▬▬▬▬▬▬▬▬▬▬▬
0:00 Intro
When the light conditions are rough, for example during sunset or sunrise, I usually try to combine multiple exposures to get a higher dynamic range. That means I have all the details in the sky (no overexposure) as well as in the foreground (no underexposure). There are many ways to do this: You could use HDR or luminosity masks, but for this video I’m going to use a Photoshop tool that’s called “Apply Image” and is a rather hidden feature in one of the many menus. Here it is important to know before I can do the exposure blending, I have to do the basic raw adjustments in the camera raw editor to get the base image right!
For this image my goal was to make it way more vibrant, with stronger golden hour colors and of course get details in the sky as well as in the foreground. I personally think some overexposure behind the tree works really good with a bit of glow which I added in Photoshop, so that overexposed part is on purpose.
0:35 1. Camera Raw Adjustments
First, I changed the camera profile to Adobe Landscape for more base saturation and adjusted the white balance to give me warmer tones throughout the photo. Also, I added more vibrance to push the colors. As I’m going to combine different exposures for the higher dynamic range, there is no need for me to adjust the shadows / highlights at this point.
Using a graduated filter over the sky however, I did drop the exposure just so I get a darker sky throughout all of the three exposures. Also, I added a graduated filter over the foreground to push the clarity and texture in this area. To add a bit of glow around the bright area over the horizon, I used a radial filter and increased the blacks, decreased the dehaze in there.
The Color Grading in the ACR editor was rather simple: With the help of the split toning I added a warm color to the highlights and the mid-tones with a rather high saturation, while adding a cold, blue tone to the shadows with a low saturation.
5:10 2. Apply Image Exposure Blending
Once I opened the three exposures in Photoshop, I placed the brightest one at the bottom, followed by the middle exposure and the dark exposure on top. I made sure the three photos are perfectly aligned using the Auto-Align Layers tool (in the Edit menu), then I turned off the middle and dark exposure layers. On both of these I added a layer mask. Next, with the layer mask of the middle exposure layer selected, I went to image – Apply Image, hit OK without changing anything and made the layer visible again. We have now blended the middle exposure with the bright exposure! Using the brush tool on the layer mask I adjusted everything a bit (making the foreground brighter) and then did the exact same thing with the dark layer.
8:50 3. Final retouching
Using the TK Panel plug in I did some dodging to the highlights and mid-tones in the foreground using an overlay layer, just to brighten it up some more. To add a bit more glow I used a hardlight layer with a bright warm brush and carefully painted in glow. Next, I adjusted the vibrance of the blue in the sky and the green in the foreground. Finally, I used the Nik Collection plug in to add a soft look (glamour glow) and some stronger colors (polarization filter).
0 Comments